Demo Gallery / Aug 21 - 6

Aug 21 - 6

Aug 22, 2026 ·07:31 ·4 players ✦ AI ANALYZED
125
Total Shots
22
Rallies
66%
Active Play
2,707
Frames Analyzed
Match Replay & Skeleton Overlay
VIDEO SIZE
,/. step · / 5s · Space play
Full AI Analysis
🎯 How accurate is this analysis? AI estimate — tap to learn more

CV 360's AI watches every frame to estimate what happened on court. Think of it as a smart coaching assistant, not a precise measuring tool — how accurate it is depends a lot on your footage.

✅ Most reliable
  • Players detected & court-coverage heatmap
  • Active-play % and rally count
  • Overall shot volume & shot mix (soft vs hard)
≈ Treat as estimates
  • Exact shot labels (serve / dink / drive)
  • Ball speed (mph) & precise timestamps
  • Skill / DUPR band — a single-video guess, not an official rating
📹 Get sharper results next time
  • One steady camera behind the baseline, framing a single court
  • Use a tripod — avoid shaky or moving shots
  • Record in the highest resolution you can (1080p or better)
  • Keep other courts & crowds out of frame; even, bright lighting helps a lot

👤 Players in this video

Not linked to a match

These are the 4 players the analyzer tracked. Link this video to a match, or name them directly, and every report will use their real names.

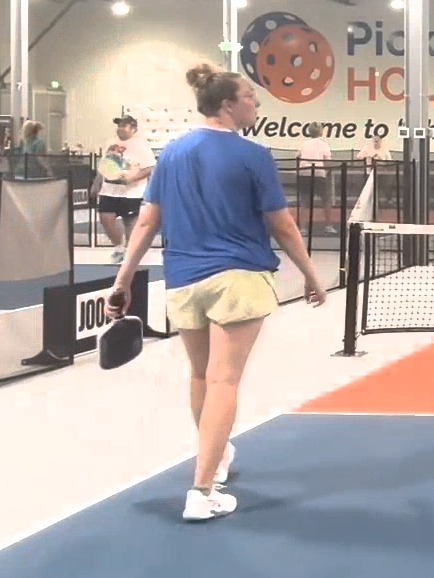
Player 1 as detected P1
Player 1
Not named Near side
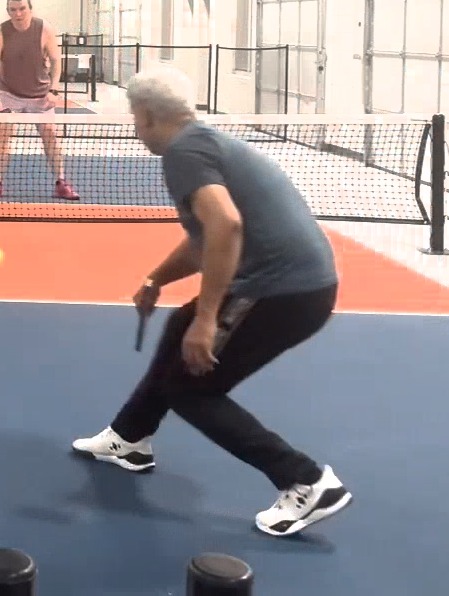
Player 2 as detected P2
Player 2
Not named Near side
Player 3 as detected P3
Player 3
Not named Far side
Player 4 as detected P4
Player 4
Not named Far side

🏆 Performance Score

CV360 Target
Pro Player
You
77 Overall
Score
vs Target: +12
Footwork
95
Balance
78
Shot Accuracy
85
Reaction Speed
42
Footwork
▲ 33 vs target
Balance
▲ 10 vs target
Shot Acc.
▲ 20 vs target
Reaction
▼ 18 vs target

🔎 Signal Quality

How much to trust each part of this specific clip — graded by the evidence available, not a generic assumption.

Players
Good
Ball
Weak
Court
Good
Shots
Good
Reaction
No data
🏓 Court calibration Calibrated
Court is calibrated — placement metrics are reliable.
Solid signal — the AI had enough evidence for the player-facing numbers in this report to be reliable.

🎯 CV 360 Skill Estimate

Match average 3.0–3.5 Intermediate
Player 1 92% confidence
3.0–3.5
Intermediate · score 57/100
High confidence · 92% ⓘ why this confidence?
Kitchen control 25
Kitchen 4%, transition 40%, baseline 56%.
Shot variety & touch 81
FH 33% / BH 11% / OH 0% / dink 56% over 9 shots.
Reaction speed 0
No reaction-time samples for this player.
Footwork & coverage 59
Lateral range 0.47, depth range 0.32.
Biomechanics 67
Posture status: needs_improvement (1 issue)
Player 2 83% confidence
3.0–3.5
Intermediate · score 50/100
High confidence · 83% ⓘ why this confidence?
Kitchen control 21
Kitchen 2%, transition 37%, baseline 62%.
Shot variety & touch 58
FH 50% / BH 40% / OH 0% / dink 10% over 10 shots.
Reaction speed 0
No reaction-time samples for this player.
Footwork & coverage 69
Lateral range 0.60, depth range 0.27.
Biomechanics 67
Posture status: needs_improvement (1 issue)
Player 3 87% confidence
3.0–3.5
Intermediate · score 46/100
High confidence · 87% ⓘ why this confidence?
Kitchen control 37
Kitchen 25%, transition 16%, baseline 59%.
Shot variety & touch 19
FH 88% / BH 8% / OH 4% / dink 0% over 25 shots.
Reaction speed 0
No reaction-time samples for this player.
Footwork & coverage 53
Lateral range 0.47, depth range 0.18.
Biomechanics 97
Posture status: good
Player 4 92% confidence
2.5–3.0
Improving Beginner · score 44/100
High confidence · 92% ⓘ why this confidence?
Kitchen control 28
Kitchen 19%, transition 10%, baseline 70%.
Shot variety & touch 29
FH 83% / BH 11% / OH 6% / dink 0% over 35 shots.
Reaction speed 0
No reaction-time samples for this player.
Footwork & coverage 45
Lateral range 0.35, depth range 0.26.
Biomechanics 97
Posture status: good
Heads up: CV 360 Skill Estimate is a per-video heuristic and is not affiliated with DUPR or any official rating body. Real-world DUPR is calculated from match wins and losses against other rated players over time — this number reflects only the on-screen play in this single video. Use it for self-comparison and trend-spotting across your own uploads, not as a substitute for an official rating.

🦴 Body Mapping & Posture Analysis

Pose skeleton overlay
P1
TEAM A
Near left
P2
TEAM A
Near right
P3
TEAM B
Far left at start
P4
TEAM B
Far right at start
Skeleton overlay — YOLO11x-Pose 17-keypoint estimation
Player 1
Player 1 · Near left
37 shots detected
Needs Improvement
Knee Angle (L)
162°
Knee Angle (R)
160°
Knee Position
Good
Stance Width
Too Wide
Back Alignment
Good
Weight Balance
Balanced
⚠ Issues (1)
• Stance too wide
💡 Tips to Improve
→ Narrow stance slightly for quicker lateral movement
🏓 Shot Breakdown
Dinks: 5 Drops: 4 Drives: 16 Serves: 5 Returns: 7
1852 frames analyzed
Player 2
Player 2 · Near right
22 shots detected
Needs Improvement
Knee Angle (L)
160°
Knee Angle (R)
165°
Knee Position
Good
Stance Width
Too Wide
Back Alignment
Good
Weight Balance
Balanced
⚠ Issues (1)
• Stance too wide
💡 Tips to Improve
→ Narrow stance slightly for quicker lateral movement
🏓 Shot Breakdown
Dinks: 7 Drops: 1 Drives: 5 Serves: 2 Returns: 6 Volleys: 1
1529 frames analyzed
Player 3
Player 3 · Far left at start
26 shots detected
Good
Knee Angle (L)
161°
Knee Angle (R)
162°
Knee Position
Good
Stance Width
Good
Back Alignment
Good
Weight Balance
Balanced
🏓 Shot Breakdown
Lobs: 2 Dinks: 5 Drives: 10 Serves: 2 Returns: 6 Volleys: 1
1169 frames analyzed
Player 4
Player 4 · Far right at start
38 shots detected
Good
Knee Angle (L)
165°
Knee Angle (R)
164°
Knee Position
Good
Stance Width
Good
Back Alignment
Good
Weight Balance
Balanced
🏓 Shot Breakdown
Dinks: 9 Drives: 12 Serves: 13 Returns: 3 Volleys: 1
1363 frames analyzed
Total keypoint detections: 8447

🏋 Biomechanical Analysis

🦵 Knee Angles
90.4°
Min
162.3°
Avg
175°
Max
Ready Position (130–170°)63.4%
Deep Bend (<130°)3%
Nearly Straight (>170°)33.7%
💪 Elbow / Arm Flex
Left Elbow
144.7°
0.4° – 180°
Right Elbow
152.6°
0° – 180°
Compact (<90°): tight backswing/follow-through
Active (90–145°): engaged hitting arm
Extended (>145°): full arm extension on drives
📏 Arm Reach & Stance
Arm Reach (torso lengths)
0.103
Min
0.89
Avg
1.491
Max
Peak reach indicates overhead/drive shots; low reach = compact dinks@if($arTorso) · 1.1 ≈ full extension
@endif
Stance Width Ratio (ankle/shoulder)
1.28
Avg Ratio
0.4 – 2.8
Range
Ideal: 1.0–1.6 (shoulder-width+ stance for CV 360)
Per-Player Arm Mechanics
Player 1
Player 1
Elbow: 151.2° (Extended)
Arm reach: 0.969 (Wide Reach)
Player 2
Player 2
Elbow: 153° (Extended)
Arm reach: 0.932 (Moderate)
Player 3
Player 3
Elbow: 145.1° (Extended)
Arm reach: 0.847 (Moderate)
Player 4
Player 4
Elbow: 142.3° (Active)
Arm reach: 0.818 (Moderate)
Posture by Swing Phase
Knee and elbow angles bucketed by each player's own shot times, instead of averaged flat across the clip.
Player Phase Knee Elbow Samples
P1 Ready 161.4° 151.5° 1980
P1 Backswing 152.3° 147.2° 72
P1 Contact 156.7° 152.4° 37
P1 Recovery 160.1° 155.5° 99
P1: 37 shot(s) timed against 2188 pose samples
P2 Ready 163.9° 153.4° 1651
P2 Backswing 152.4° 148.3° 39
P2 Contact 153.8° 152.9° 22
P2 Recovery 154° 146.8° 60
P2: 22 shot(s) timed against 1772 pose samples
P3 Ready 163.4° 148° 1895
P3 Backswing 161.8° 141.6° 47
P3 Contact 161° 130.7° 26
P3 Recovery 161.3° 138.9° 70
P3: 26 shot(s) timed against 2038 pose samples
P4 Ready 165.9° 143.2° 2179
P4 Backswing 166.4° 136.7° 72
P4 Contact 165.5° 147.1° 38
P4 Recovery 165.1° 144.9° 104
P4: 38 shot(s) timed against 2393 pose samples

🕐 Shot Events Timeline

125 Total Events
~6 mph* Avg Wrist Speed*
~27 mph* Peak Wrist Speed*
22 Burst Shots

* Wrist speed is a relative shot-power proxy from keypoint motion at the sampled frame rate — it is not a real-world mph and is not comparable to ball speed. At ~2.7 fps, true swing/ball velocity can't be measured (see the Ball Speed panel's confidence).

Serves
22
Returns
22
Drops
5
Dinks
26
Drives
45
Volleys
3
Lobs
2
Event Log 125 of 125 shots • 23 rallies
Rally 1 00:20–00:22 3 shots 1.83s P2 · P3
00:20 Serves Serve Drive swing P3
00:21 Returns Return Drive swing P2
00:22 Drives 3rd Shot Medium swing P3
Rally 2 00:24–00:27 3 shots 2.67s P1
00:24 Serves Serve Medium swing P1
00:25 Returns Return Medium swing P1
00:27 Drives 3rd Shot Drive swing P1
Rally 3 00:31–00:34 5 shots 3.17s P1 · P3 · P4
00:31 Serves Serve Medium swing P4
00:32 Returns Return Drive swing P4
00:33 Dinks 3rd Shot Medium swing P1
00:33 Drives Rally Soft swing P4
00:34 Dinks Rally Medium swing P3
Rally 4 00:52–00:54 4 shots 2.5s P1 · P2 · P4
00:52 Serves Serve Medium swing P4
00:53 Returns Return Medium swing P1
00:54 Dinks 3rd Shot Soft swing P4
00:54 Drives Rally Drive swing P2
Rally 5 01:00–01:08 9 shots 8.17s P1 · P4
01:00 Serves Serve Drive swing P1
01:01 Returns Return Drive swing P1
01:02 Drives 3rd Shot Drive swing P1
01:03 Drives Rally Medium swing P4
01:04 Volleys Rally Burst ⚡ swing P4
01:05 Drives Rally Burst ⚡ swing P4
01:05 Drives Rally Drive swing P1
01:06 Drives Rally Medium swing P4
01:08 Drives Rally Drive swing P1
Rally 6 01:16–01:17 2 shots 1.33s P4
01:16 Serves Serve Burst ⚡ swing P4
01:17 Returns Return Burst ⚡ swing P4
Rally 7 01:44–01:45 2 shots 0.34s P2 · P4
01:44 Serves Serve Drive swing P4
01:45 Returns Return Medium swing P2
Rally 8 02:09–02:15 10 shots 6.17s P1 · P2 · P3 · P4
02:09 Serves Serve Medium swing P4
02:09 Returns Return Burst ⚡ swing P3
02:10 Drives 3rd Shot Medium swing P1
02:10 Dinks Rally Medium swing P4
02:11 Dinks Rally Medium swing P2
02:11 Dinks Rally Drive swing P3
02:12 Dinks Rally Drive swing P1
02:13 Dinks Rally Drive swing P3
02:15 Dinks Rally Drive swing P1
02:15 Drives Rally Drive swing P3
Rally 9 02:30–02:33 4 shots 3.5s P1 · P2 · P4
02:30 Serves Serve Burst ⚡ swing P1
02:31 Returns Return Medium swing P1
02:32 Drives 3rd Shot Drive swing P4
02:33 Drops Rally Medium swing P2
Rally 10 03:10–03:11 3 shots 1.16s P1 · P3 · P4
03:10 Serves Serve Medium swing P3
03:11 Returns Return Burst ⚡ swing P1
03:11 Dinks 3rd Shot Medium swing P4
Rally 11 03:24–03:27 3 shots 2.34s P1 · P2 · P4
03:24 Serves Serve Medium swing P2
03:26 Returns Return Drive swing P4
03:27 Drives 3rd Shot Drive swing P1
Rally 12 04:06–04:07 2 shots 0.34s P2 · P4
04:06 Serves Serve Medium swing P4
04:07 Returns Return Burst ⚡ swing P2
Rally 13 04:17–04:26 16 shots 9.67s P1 · P2 · P3 · P4
04:17 Serves Serve Soft swing P4
04:17 Returns Return Soft swing P3
04:17 Dinks 3rd Shot Medium swing P4
04:18 Dinks Rally Medium swing P3
04:18 Drives Rally Drive swing P4
04:19 Drops Rally Medium swing P1
04:20 Drives Rally Drive swing P4
04:21 Drives Rally Drive swing P1
04:21 Dinks Rally Soft swing P4
04:22 Dinks Rally Medium swing P2
04:22 Dinks Rally Medium swing P1
04:23 Dinks Rally Medium swing P4
04:23 Dinks Rally Medium swing P1
04:23 Dinks Rally Medium swing P2
04:24 Dinks Rally Drive swing P2
04:26 Volleys Rally Burst ⚡ swing P2
Rally 14 04:29–04:33 5 shots 4s P1 · P2 · P3 · P4
04:29 Serves Serve Burst ⚡ swing P1
04:30 Returns Return Medium swing P1
04:31 Drives 3rd Shot Medium swing P4
04:32 Drives Rally Drive swing P3
04:33 Drives Rally Drive swing P2
Rally 15 04:43–04:44 2 shots 0.34s P2 · P4
04:43 Serves Serve Medium swing P4
04:44 Returns Return Drive swing P2
Rally 16 05:22–05:22 2 shots 0.33s P3 · P4
05:22 Serves Serve Soft swing P4
05:22 Returns Return Medium swing P3
Rally 17 05:41–05:47 8 shots 5.83s P1 · P2 · P3 · P4
05:41 Serves Serve Burst ⚡ swing P4
05:42 Returns Return Medium swing P1
05:43 Lobs 3rd Shot Burst ⚡ swing P3
05:44 Drives Rally Medium swing P3
05:45 Drives Rally Drive swing P2
05:45 Drives Rally Burst ⚡ swing P3
05:46 Drives Rally Medium swing P1
05:47 Drives Rally Drive swing P3
Rally 18 05:50–05:54 7 shots 4.66s P1 · P2 · P3 · P4
05:50 Serves Serve Drive swing P4
05:51 Returns Return Burst ⚡ swing P2
05:51 Drives 3rd Shot Drive swing P3
05:52 Drives Rally Burst ⚡ swing P3
05:53 Dinks Rally Drive swing P2
05:54 Drives Rally Burst ⚡ swing P1
05:54 Drives Rally Medium swing P1
Rally 19 05:57–05:58 2 shots 1s P3 · P4
05:57 Serves Serve Medium swing P4
05:58 Returns Return Medium swing P3
Rally 20 06:10–06:10 2 shots 0.33s P1 · P2
06:10 Serves Serve Burst ⚡ swing P1
06:10 Returns Return Medium swing P2
Rally 21 06:30–06:41 13 shots 10.67s P1 · P2 · P3 · P4
06:30 Serves Serve Dink swing P4
06:31 Returns Return Drive swing P3
06:32 Drives 3rd Shot Soft swing P3
06:32 Drives Rally Medium swing P2
06:33 Lobs Rally Drive swing P3
06:34 Drives Rally Drive swing P4
06:34 Drives Rally Drive swing P3
06:35 Drops Rally Medium swing P1
06:37 Drives Rally Drive swing P1
06:38 Drops Rally Medium swing P1
06:39 Dinks Rally Medium swing P4
06:40 Drives Rally Burst ⚡ swing P4
06:41 Drops Rally Medium swing P1
Rally 22 06:50–06:53 4 shots 3s P1 · P2 · P3
06:50 Serves Serve Burst ⚡ swing P2
06:50 Returns Return Burst ⚡ swing P3
06:50 Drives 3rd Shot Drive swing P1
06:53 Drives Rally Drive swing P1
Unattributed 14 shots no rally
00:01 Drives Isolated Burst ⚡ swing
00:07 Drives Isolated Medium swing
00:14 Dinks Isolated Medium swing P3
00:47 Dinks Isolated Drive swing P4
01:11 Dinks Isolated Medium swing P2
01:29 Drives Isolated Medium swing P1
01:33 Dinks Isolated Burst ⚡ swing P2
02:42 Drives Isolated Drive swing P4
03:50 Dinks Isolated Medium swing P4
04:14 Drives Isolated Drive swing P2
06:19 Drives Isolated Drive swing P1
06:59 Volleys Isolated Medium swing P3
07:07 Drives Isolated Drive swing P4
07:12 Drives Isolated Drive swing P1

📍 Player Court Positioning

Player 1
Player 1
P1
Left Court cx: 0.277
0.468
Lateral Range
2258
Frames Tracked
Player 2
Player 2
P2
Right Court cx: 0.724
0.599
Lateral Range
1802
Frames Tracked
Player 3
Player 3
P3
Center Court cx: 0.522
0.473
Lateral Range
2040
Frames Tracked
Player 4
Player 4
P4
Center Court cx: 0.574
0.348
Lateral Range
2396
Frames Tracked
Court View — Top Down (2D)
Far baseline
Net
Near baseline
P1
P1
P2
P2
P3
P3
P4
P4
Left sidelineRight sideline

🎬 Scene Analysis

Detected video segments by player presence in frame

👥
00:01 – 07:30 Players Present 449.3s • 4 player(s)
Players in frame: 449.3s (100%)
Segments detected: 1

👥 Players Detected

Player 1
Player 1
Team A  90% conf.
Player 2
Player 2
Team A  92% conf.
Player 3
Player 3
Team B  81% conf.
Player 4
Player 4
Team B  80% conf.

🏓 Shot Analysis

125Total Shots
0.255Max Velocity
22Burst Shots
Serves
22
Returns
22
Drops
5
Dinks
26
Drives
45
Volleys
3
Lobs
2
Wrist speed analysis (est.): Avg ~6 mph · Peak ~27 mph · 22 burst shots (wrist speed, not ball speed — approx.)

🎯 3D Shot Viewer

Interactive 3D court visualization — drag to rotate · scroll to zoom · click a preset to snap to a view angle.

🏓 Ball detector: learned model ✨ trajectory smoothed · 70 outliers rejected ✅ Ball track verified · median 0.158
Building shot view…
Legend
Shot Trajectories
Dinks
Drives
Serves
Returns
Volleys
Drops
Arc Confidence
Solid — landing measured from a detected bounce
Dashed — landing is a stylized estimate, not measured
Court Markers
Ball Positions — Each dot = one detected ball location across the match
Player 1 / P3 — Average court position (cylinder)
Player 2 / P4 — Average court position (cylinder)
Net — Centre divider at 34″ height
Kitchen Line — No-volley zone boundary (7 ft from net)
🖱 Drag to rotate · Scroll to zoom · Click a shot to jump the video

📊 Match Timeline

0:00 3:45 7:31
Active Rally Highlight Serve Dink Drive Return Volley Drop — click to seek

⚡ Auto Highlights

Rally 04:09
22-shot rally exchange
Rally #12 - 04:09
22 shots · 31s
Rally 05:40
17-shot rally exchange
Rally #17 - 05:40
17 shots · 20s
Rally 06:29
13-shot rally exchange
Rally #21 - 06:29
13 shots · 15s
Rally 00:58
Quick 10-shot rally
Rally #5 - 00:58
10 shots · 15s
Rally 04:06
Quick 2-shot rally
Rally #12 - 04:06
2 shots · 3s
Rally 02:09
Quick 10-shot rally
Rally #8 - 02:09
10 shots · 10s
Rally 06:43
Quick 4-shot rally
Rally #21 - 06:43
4 shots · 10s
Rally 02:25
Quick 4-shot rally
Highlight - 02:25
4 shots · 10s
Rally 03:19
Quick 3-shot rally
Highlight - 03:19
3 shots · 9s
Rally 06:09
Quick 2-shot rally
Rally #20 - 06:09
2 shots · 6s
Click a card to play the clip in a popup ▸

🗺 Performance Heatmaps

Movement Density
Rendering…
Low
High activity
Click a player chip to isolate · hover any spot for stats
Tactical Insights
36% Drives was the most used shot — 36% of all shot events
25% of shots were kitchen shots (dinks + drops) — room to improve kitchen game
18% of shots were burst/drive shots (22 total) — high power execution
66% Active play rate — video time spent in active rallies
7/6 Shot variety — 7 different shot types detected — excellent tactical range
2.9/min Rally frequency — 2.9 rallies per minute of video
50% of detected players showed good posture (2 of 4)

⚡ Ball Speed Analytics

Peak Speed
53.3mph
85.8 km/h
Average Speed
16.1mph
25.9 km/h
Velocity Samples
188
measured ball moves
Scale & Confidence
🎯 Court-scaled · Medium
Court-scaled, but a limited frame rate — treat peak as approximate.

🏠 Court Zone Dwell Time

Player 1
near-side
39.8%
56.3%
Kitchen 3.8% Transition 39.8% Baseline 56.3%
🔻 Kitchen-shy — train forward play
Player 2
near-side
36.7%
61.8%
Kitchen 1.6% Transition 36.7% Baseline 61.8%
🔻 Kitchen-shy — train forward play
Player 3
far-side
24.7%
16.5%
58.8%
Kitchen 24.7% Transition 16.5% Baseline 58.8%
✅ Healthy kitchen engagement
Player 4
far-side
19.2%
10.5%
70.3%
Kitchen 19.2% Transition 10.5% Baseline 70.3%
⚠ Spends most time back

🏓 Rally Analytics ≈ ESTIMATE

Grouped from detected shot events — approximate. Counts drift if shots are over/under‑detected, and the per‑rally player tags are the least reliable part (player‑tracking limitation).

22
Total Rallies
5
Avg Shots / Rally
3.3s
Avg Duration
16
Longest (shots)
10.67s
Longest (time)
# Start Duration Shots Players
1 00:20 1.83s 3 P2P3
2 00:24 2.67s 3 P1
3 00:31 3.17s 5 P1P3P4
4 00:52 2.5s 4 P1P2P4
5 01:00 8.17s 9 P1P4
6 01:16 1.33s 2 P4
7 01:44 0.34s 2 P2P4
8 02:09 6.17s 10 P1P2P3P4
9 02:30 3.5s 4 P1P2P4
10 03:10 1.16s 3 P1P3P4
11 03:24 2.34s 3 P1P2P4
12 04:06 0.34s 2 P2P4
13 04:17 9.67s 16 P1P2P3P4
14 04:29 4s 5 P1P2P3P4
15 04:43 0.34s 2 P2P4
16 05:22 0.33s 2 P3P4
17 05:41 5.83s 8 P1P2P3P4
18 05:50 4.66s 7 P1P2P3P4
19 05:57 1s 2 P3P4
20 06:10 0.33s 2 P1P2
21 06:30 10.67s 13 P1P2P3P4
22 06:50 3s 4 P1P2P3

🤚 Swing Distribution

Player 1
9 of 37 shots classified
33.3%
11.1%
55.6%
Forehand 3 (33.3%) Backhand 1 (11.1%) Overhead 0 (0%) Dink/Low 5 (55.6%)
🎯 Touch player — kitchen specialist
Player 2
10 of 22 shots classified
50%
40%
10%
Forehand 5 (50%) Backhand 4 (40%) Overhead 0 (0%) Dink/Low 1 (10%)
⚖ Balanced swing distribution
Player 3
25 of 26 shots classified
88%
8%
Forehand 22 (88%) Backhand 2 (8%) Overhead 1 (4%) Dink/Low 0 (0%)
🤚 Heavy forehand bias — train backhand
Player 4
35 of 38 shots classified
82.9%
11.4%
Forehand 29 (82.9%) Backhand 4 (11.4%) Overhead 2 (5.7%) Dink/Low 0 (0%)
🤚 Heavy forehand bias — train backhand

🎯 Error Analysis

In Bounds
14
on the court
Out of Bounds
2
unforced errors
Error Rate
12.5%
of total bounces
Tracked Bounces
16
ball bounces — not shots
✅ Good accuracy — error rate within healthy range
Where errors landed
Beyond Far Baseline
2 errors
🕵️ Opponent Scouting Report 4 players
Per-Player Tactical Summary
P1
Player 1
Left Court
🎯Dominant ShotDink
↔️Lateral TendencyStays left
↕️Depth TendencyBaseline player
⚠️
Weakness to Exploit
Weak backhand wing — pressure their backhand side
"You handled a 30% shot share with great touch (55.6% dinks), but you spent 39.8% of your time in the transition zone and only 3.8% at the kitchen line. Your movement was also hindered by an overly wide stance posture flag, which slows your recovery through mid-court. Lingering in transition leaves you vulnerable to balls at your feet instead of neutralizing at the net. Practice the 'Drop-and-Split' drill, hitting third-shot drops from mid-court with a shoulder-width stance and immediately establishing position right at the non-volley zone."
P2
Player 2
Right Court
🎯Dominant ShotForehand
↔️Lateral TendencyStays right
↕️Depth TendencyBaseline player
⚠️
Weakness to Exploit
Rarely uses the overhead — exploit that gap
"You displayed balanced swing mechanics with 50.0% forehands and 40.0% backhands along with wide lateral coverage (0.599 range), but you remained stranded at the baseline for 61.8% of the match and logged just 1.6% at the kitchen. Additionally, your stance width was identified as too wide, slowing your recovery after deep lateral reaches. To turn defense into offense, you need to narrow your base and work your way up to the kitchen line. Run the 'Transition Reset Ladder' drill, where you defend drives from the baseline, step forward to reset into the kitchen with a compact stance, and advance to the net."
P3
Player 3
Center Court
🎯Dominant ShotForehand
↔️Lateral TendencyCenter court
↕️Depth TendencyMid-court
⚠️
Weakness to Exploit
Weak backhand wing — pressure their backhand side
"You displayed clean posture with zero alignment issues across 2,040 frames and reached the kitchen for 24.7% of rallies, but you showed an extreme forehand bias at 88.0% compared to just 8.0% backhands. This heavy imbalance exposes your backhand wing and forces you into inefficient recovery positions when running around balls. Developing dependable backhand mechanics will keep opponents from overloading your left side. Implement the 'Backhand-Only Kitchen Reset' drill, requiring you to execute 10 consecutive crosscourt resets and dinks solely off the backhand wing before resetting."
P4
Player 4
Center Court
🎯Dominant ShotForehand
↔️Lateral TendencyCenter court
↕️Depth TendencyMid-court
⚠️
Weakness to Exploit
Weak backhand wing — pressure their backhand side
"You carried a major 30% shot share across 38 total shots, but you stayed anchored to the baseline for 70.3% of the match and favored your forehand heavily at 82.9% versus 11.4% backhands. Recording 0.0% low dinks indicates you are over-relying on baseline power rather than developing soft approaches. To prevent opponents from keeping you pinned deep, you must integrate soft drops off both wings. Execute the 'Third-Shot Drop & Advance' drill, hitting drop shots specifically from your backhand baseline and following the ball directly up to the kitchen line."
Tactical Exploit Tip
Opponents avoid drops — push them back with deep returns and attack the transition zone.

💡 AI Coach Insight

Player 1

You handled a 30% shot share with great touch (55.6% dinks), but you spent 39.8% of your time in the transition zone and only 3.8% at the kitchen line. Your movement was also hindered by an overly wide stance posture flag, which slows your recovery through mid-court. Lingering in transition leaves you vulnerable to balls at your feet instead of neutralizing at the net. Practice the 'Drop-and-Split' drill, hitting third-shot drops from mid-court with a shoulder-width stance and immediately establishing position right at the non-volley zone.

Player 2

You displayed balanced swing mechanics with 50.0% forehands and 40.0% backhands along with wide lateral coverage (0.599 range), but you remained stranded at the baseline for 61.8% of the match and logged just 1.6% at the kitchen. Additionally, your stance width was identified as too wide, slowing your recovery after deep lateral reaches. To turn defense into offense, you need to narrow your base and work your way up to the kitchen line. Run the 'Transition Reset Ladder' drill, where you defend drives from the baseline, step forward to reset into the kitchen with a compact stance, and advance to the net.

Player 3

You displayed clean posture with zero alignment issues across 2,040 frames and reached the kitchen for 24.7% of rallies, but you showed an extreme forehand bias at 88.0% compared to just 8.0% backhands. This heavy imbalance exposes your backhand wing and forces you into inefficient recovery positions when running around balls. Developing dependable backhand mechanics will keep opponents from overloading your left side. Implement the 'Backhand-Only Kitchen Reset' drill, requiring you to execute 10 consecutive crosscourt resets and dinks solely off the backhand wing before resetting.

Player 4

You carried a major 30% shot share across 38 total shots, but you stayed anchored to the baseline for 70.3% of the match and favored your forehand heavily at 82.9% versus 11.4% backhands. Recording 0.0% low dinks indicates you are over-relying on baseline power rather than developing soft approaches. To prevent opponents from keeping you pinned deep, you must integrate soft drops off both wings. Execute the 'Third-Shot Drop & Advance' drill, hitting drop shots specifically from your backhand baseline and following the ball directly up to the kitchen line.

Whole-match summary

High-intensity session — 66% active play across 4 player(s). Excellent court engagement. Shot profile: 36% drives — power-heavy game. Practise the third-shot drop (5 drops detected) to approach the kitchen more consistently. Swing intensity: 18% high-intensity bursts across 125 shots — a workable mix of pace and touch. 22 rallies detected — longest 10.7s, averaging ~5.7 shots/rally. Long rallies indicate strong consistency — focus on speed-up opportunities to close out points. P2 shows wide lateral coverage (range 0.60) — good mobility. Ensure quick recovery to centre after wide shots. Top moment: "Rally #12" at 249s. Keep logging your sessions to build a long-term performance profile.

📊 Statistics

66% Active Play Time
4.1 Avg Motion Score
10.7s Longest Rally
3.2 Avg Players / Frame
Want this analysis for your own matches?

Upload a video or record live — CV 360's AI breaks down every shot, rally, and movement in minutes.

Get Started Free →